NG-1000 Series
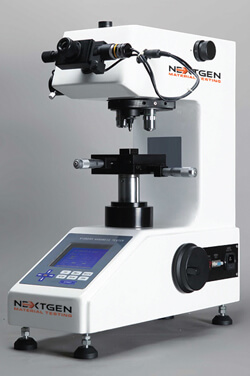
NextGen Material Testing, Inc. offers a highly precise and cost effective option for all Vickers and Knoop testing requirements. The NG1000 hardness tester is available in different configurations (AGEN, DGEN and CCD) in order to meet all requirements for sample volumes and required accuracy. The NG1000 features an easy to see LCD display in all lighting environments, motorized turret, built in mini printer and a user friendly menu for operation. Optional items include a 15x Eyepiece, digital micrometers, automatic VickSoft software and dual Vickers and Knoop indenters.
After positioning the test specimen through the use of the observation objective (10x – Optional 15x), the operator can set the test parameters and start the test. All NG1000 series hardness testers include a motorized turret and automatic testing procedure. The major variances include how the operator measures the indentation to receive the final Vickers or Knoop hardness value. After the testing cycle is complete, the NG1000 will automatically rotate the motorized turret to the 40x Measurement Objective.
Standards
The NG1000 meets the latest version of all industry standards for Vickers hardness testing. These standards include ASTM E384 and EN-ISO 6507.
Configurations
AGEN
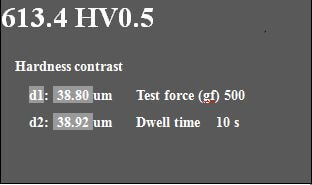
NG1000AGEN requires more involvement from the operator to measure the indentation. After the testing cycle is completed, the operator must begin to inspect the indentation through the eyepiece. Through the use of a wheel located on the eyepiece, the operator must align the micrometers with the edge of the indentation. The operator can then use the micrometers to measure on the visual ruler. By entering these values into the NG1000 LCD panel, the system will generate a Vickers/Knoop hardness value and will then display it to be written down or printed on the mini printer.
DGEN
NG1000DGEN removes the need for the operator to measure the indentation manually on the visual ruler. By simply aligning the micrometers with the edge of the indentation, the operator can send the measurement directly into the hardness testing system through the push of a button. By doing this, the NG1000DGEN will automatically generate and display your Vickers or Knoop hardness value to be written down or printed on the mini printer.
CCD
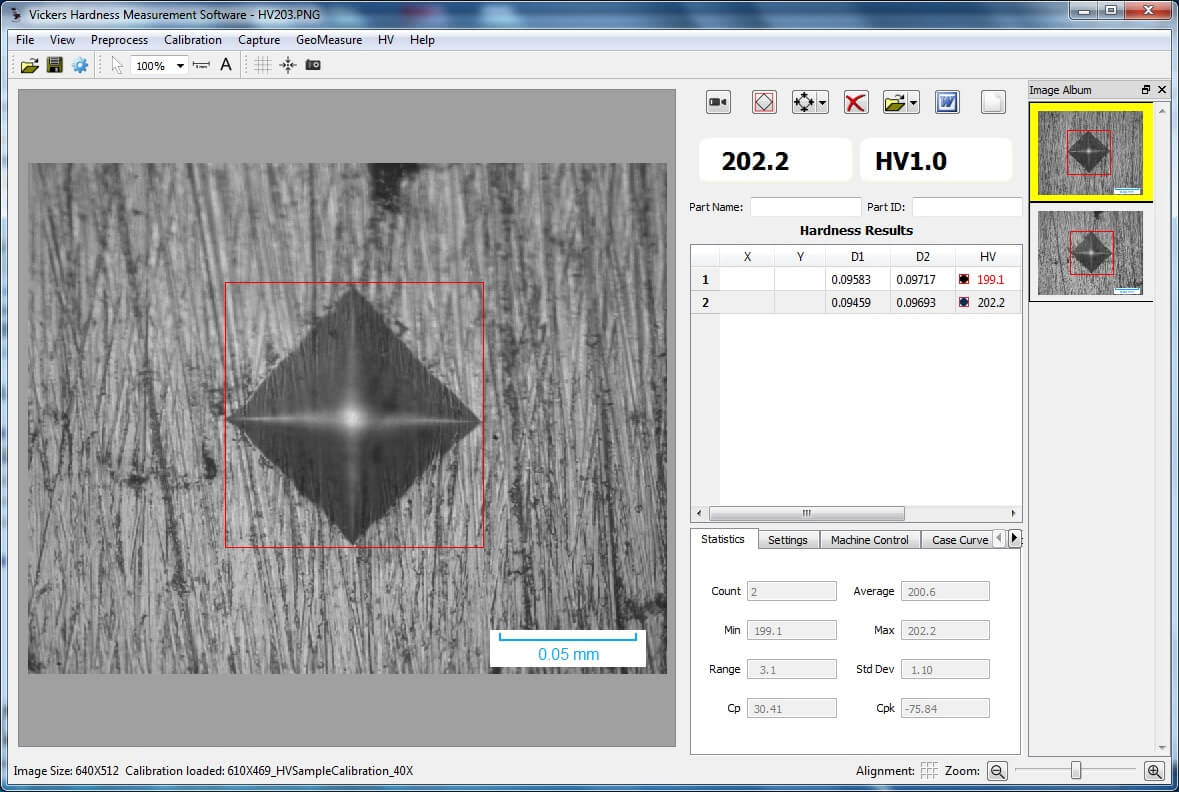
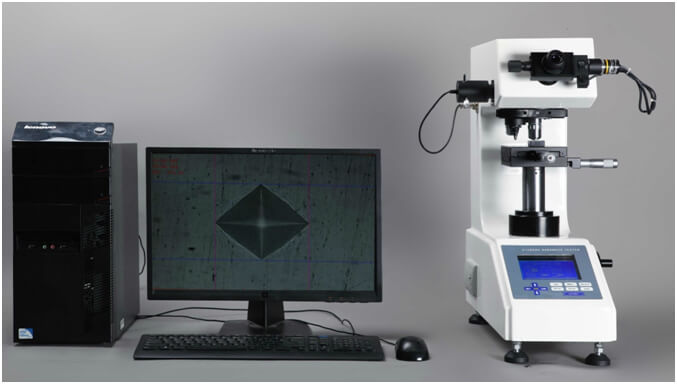
NG1000CCD has all the features of the NG1000DGEN hardness tester with the addition of a CCD camera and user friendly NG VickSoft software. The CCD configuration allows the tester to be connected to your computer. After a test is complete, the CCD camera will capture a magnified image of your indentation. NG-VickSoft can then be used to measure your indentation with ease while organizing all of your hardness testing results in a simple report.
Vickers Menu
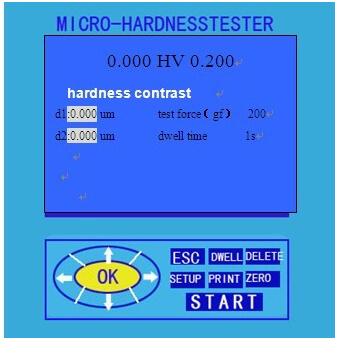
The user friendly control panel allows you to easily navigate through the NG1000 menu. Test parameters can quickly be changed to suit your testing requirements.
Hardness Conversions
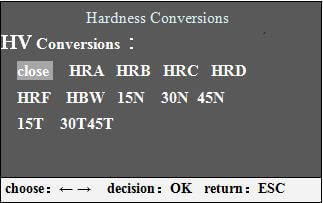
The NG1000 series also has the capabilities of displaying a converted Vickers value into other popular hardness testing scales. These scales include HRA, HRB, HRC, HRD, HRF, HBW, HR15N, HR30N, HR45N, HR15T, HR30T and HR45T.
NG1000CCD VickSoft Control Software
The NG1000CCD VickSoft software allows you to view all of your hardness results in a easy viewing panel. You can store and look back at your indentation images for re-measuring when necessary. The NG-VickSoft also allows you to plot your case depth curves and create reports for your hardness testing measurements.
Common Applications
Vickers hardness testing is reliable for measuring the hardness of a variety of metals and ceramic materials. The Vickers test has one of the widest ranges among all hardness scales
10g (0.098N), 25g (0.245N), 50g (0.49N), 100g (0.98N ), 200g (1.96N), 300g (2.94N), 500g (4.9N), 1000g (9.8N)
Maximum Travel Range 2.5cm x 2.5cm
Moving Resolution Ratio 0.1mm
Warranty and Extended Warranty
Extended warranty support can be additional purchased for every one of NextGen’s units. You may inquired about extended warranty options at time of purchase.
Our unique advantage is our Life-Time Consultation Advantage extended to all of our clients. This service allows for an ongoing support, problem resolution and specific technical requirement consultations for the life-time of your equipment. Please feel free to contact us by phone or e-mail or submit your question here. Minor repairs, calibration services (specific models), and other support is offered as a part of this free service.
Lead Time
NextGen Material Testing, Inc. specializes in manufactured-to-order equipment for our clients best satisfaction. We proud to provide you with a guaranteed brand new unit for your long-term operation. This is why we put an approximate lead times on your quotation. There are exceptions to when the order can be expedited, however in not in the majority of cases.
Overall Price and Quality
NextGen Material Testing, Inc. is committed to providing every client with the highest quality equipment for the lowest possible price. We achieve this through our corporate infrastructure. Low overhead, high production volumes, and cutting out any possible middle men allows NextGen Material Testing, Inc. to deliver better quality testing equipment at a lesser cost.
We understand that purchasing Quality Control Equipment is an equivalent of entering into a long-term relationship with your Quality Provider that can last for decades and beyond. This is why NextGen is honoured to provide you with the highest quality products to reflect the same loyal, long-term commitment back to you. The quality of relationships NextGen develops with all of our clients is one of our secrets to success that creates a mutual win-win situation and leads to your ultimate satisfaction.
Calibration, Training and Installation
NextGen Material Testing, Inc. prides in providing you with fully calibrated equipment which is over 90% ready for use. Our user-friendly interface, installation and training videos, and easy-to-read operations manuals allow the operator to swiftly grasp the operation of the equipment for immediate use. Additionally, our service engineers are happy to further assist you by phone, e-mail, Skype, as well as Team Viewer to provide you with the ability to operate your equipment right away.
Yes, training and installation is available for all of our equipment. A team of trained professionals stand ready to serve your quality service needs. As a global company, we are able to provide training and installation anywhere our clients are. Contact your product consultant to request the training and installation quotation based on your purchased equipment.
Price Comparison and Price Match Advantage
The majority of the time, NextGen is able to offer you a price match for a true product apple-to-apple comparison. Each case is unique and will be reviewed for approval. All cases will be reviewed and answered within 1 to 2 business days. Our competitor's quotation must be forwarded to our Director of Sales at moc.tsetnegtxen@selas to begin the process for approval.
